Once the canvas is ready, let’s start to draw!!
Here, we’ll introduce brush and eraser usage first, and adjustment for brush later.
Brush Function
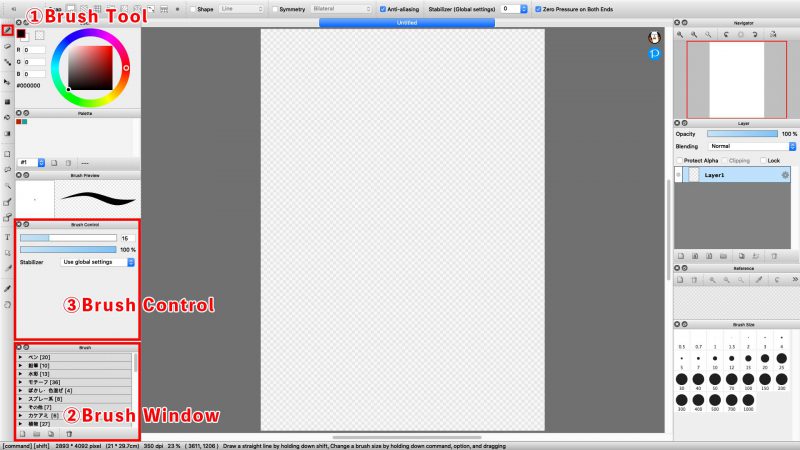
Choose your favorite brush from brush tool (shown as 1), and try it on your canvas.
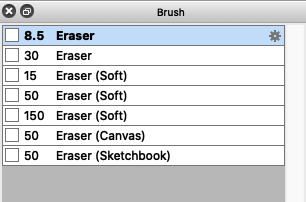
Brush can be selected from brush window (shown as 2).
Opacity and size are adjustable at the control panel (shown as 3).
Free to try different brushes!!
Eraser Function
If any redundant lines showing on your canvas, use erasers to wipe them away.
Choose eraser tool (shown as 4 under the brush tool)
Like brush function, size and opacity are adjustable.
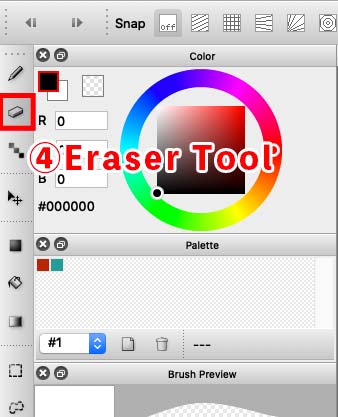
Different types of eraser are provided as well.
Anti-aliasing Function
Anti-aliasing is a function that makes the jagged edges less noticeable.
If you find the lines you draw do have this kind of issue, check anti-aliasing function (shown as 5)

Anti-aliasing could be checked and set in the upper menu bar. While the mark is checked, its function is turned ON.
This is what it looks when you switch to ON or OFF.
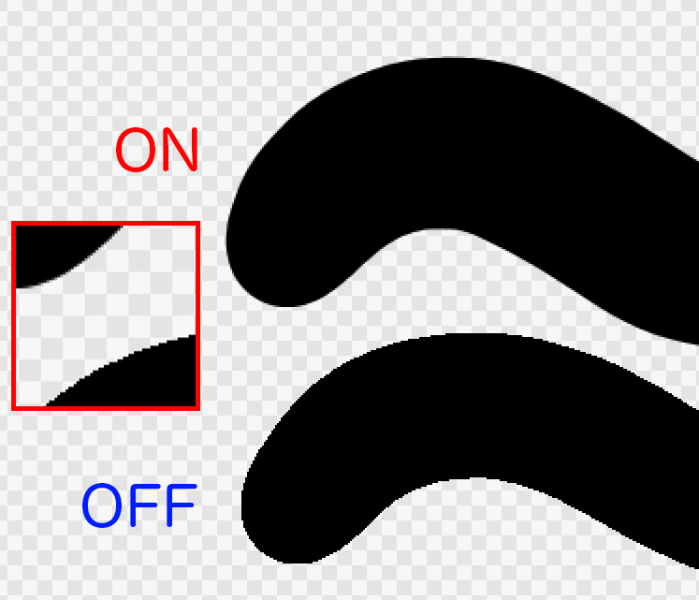
Let’s switch its status and see any difference there.
Stabilize Image (Reduce Shakes)
This is the function that modifies lines, which usually happens when users draws but with his hands shaking.
You could check the setting status in the upper menu bar. (Shown as 6)

The number itself goes higher, the stronger effect of it is. Meanwhile, the speed of drawing goes slower.
Adjust the setting and find the pattern that suits you.
Next, we’ll proceed with color setting.

![How to add color? [Tutorial 5]](https://hub.firealpaca.net/wp-content/uploads/2021/06/samune_5en.png)
![Set the new canvas!! [Tutorial 3]](https://hub.firealpaca.net/wp-content/uploads/2021/06/samune_3en.png)
