We’ll go through the basic tool features!
If you are not familiar with the panel structure, please check the previous tutorial. <Tutorial 10>
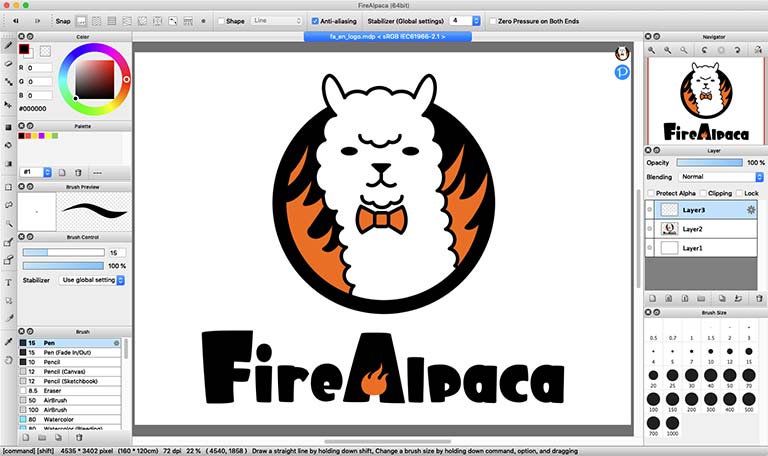
Color Window
This is the window used for creating the brush color.
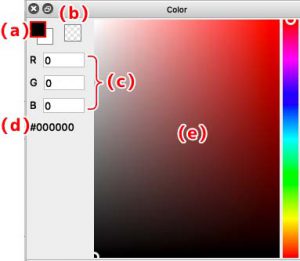
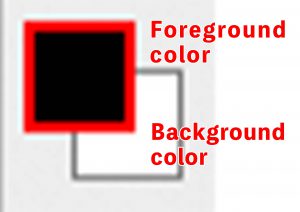
(a)Represents the foreground and background colors of the brush. You could swap the foreground to background color by clicking on it.
Usually, brush is used for the foreground color. Background color is used for some brush like bold pen.
(b)Click on it and change the brush color to transparency.
(c)The RGB value of the foreground will be displayed. You can also change the RGB here.
(d)The color code of the foreground will be displayed. You can “copy/paste” the color code here, so that you could find your favorite color much faster.
(e)Once clicked, it will turn into foreground. Switch between the color wheel and the color bar as your preference.
For more information about the color wheel, color bar or transparency, please refer to tutorial 5 “How to add color? ”
Brush Preview Window
This is the window that shows the brush shape you chose.
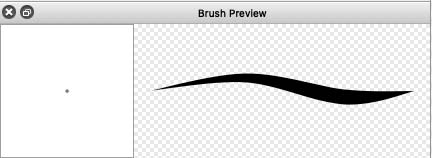
You can reset the brush size once you click on the brush preview window.
Brush Control Window
This is the window used for changing brush size and transparency.
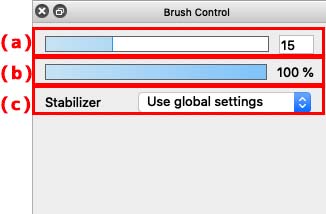
(a)Available for changing brush size
(b)Available for changing brush transparency
(c)Stabilize image, modify hand-shaking
Even though the brush size is adjusted in control window, it will return to its original setting when the application reopened.
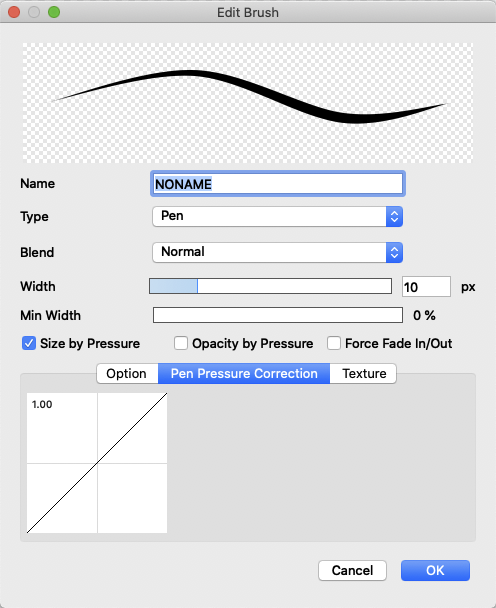
If you want to set the default size, please refer to Edit Brush Window.
Brush Window
This is the window for brush selection and edition.
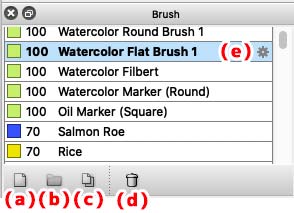
(a)Add new brush
(b)Add folder
(c)Copy the selected brush
(d)Delete brush
(e)Open Edit Brush Window
(e)Click on the gear icon and edit brush window will open. You can change the default brush size and other settings.
Layer Window
The layer window is for dealing with anything related to layers.
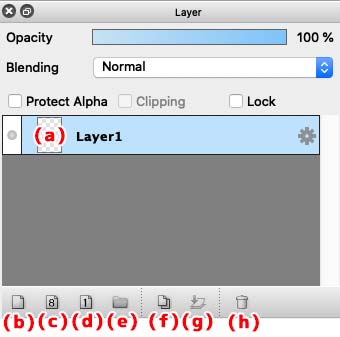
(a)Layer thumbnail
(b)Add new color layer (with full color layer)
(c)Add 8bit layer (with white/grey/black layer)
(d)Add 1bit layer (with white and black)
(e)Add layer folder
(f)Copy selected layer
(g)Combine the layer with the one underneath
(h)Delete layer
Information window
Information window displays anything you would want to take as reference.
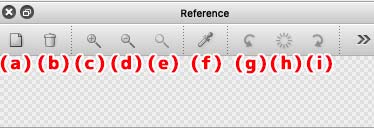
(a)Import document as your reference
(b)Delete imported document
(c)Zoon in
(d)Zoom out
(e)Original display size
(f)Extract the color of the document
(g)Rotate the document counterclockwise
(h)Reset the rotation
(i)Rotate the document clockwise
Brush size window
It is convenient to register the brush size in advance on brush size window so that you could change it easily.
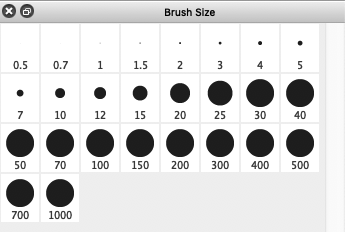
Right-click on the brush size window, go to “Edit Brush Size”, and then the window will show it up.
You could register your favorite brush size by adding the line break in this page.
If you want to return to the initial setting, please click “Initialize Brush Size”.
Get used to the different functions on FireAlpaca!!
Next, we’ll introduce how to operate the canvas.
![How to deal with the canvas? [Tutorial 12]](https://hub.firealpaca.net/wp-content/uploads/2021/06/samune_12en.png)
![Basic Panel Manipulation [Tutorial 10]](https://hub.firealpaca.net/wp-content/uploads/2021/06/samune_10en.png)