[Texture / Final Complete]
Texture
Next, we will make use of “Texture” to create a more realistic watercolor effect.
Since we also want to use canvas background, we will add texture brush.
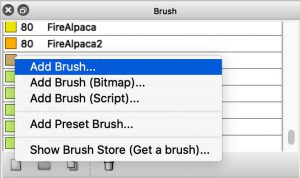
Here are the steps for adding a texture brush.
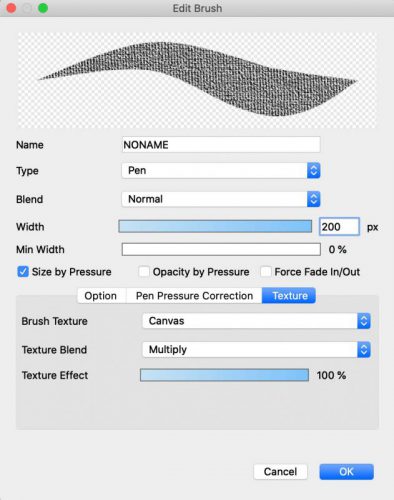
Paint with all the entire area with the brush you created.
Select grey color.
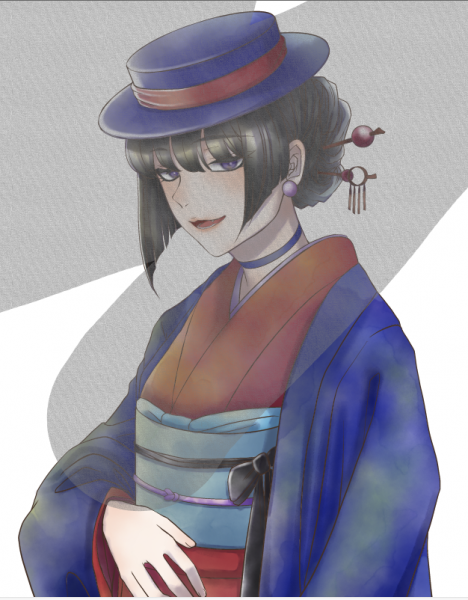
After filled with grey color of the entire image, set “Burn” and decrease the opacity to 20%.
Not yet finished!! Use “Transform” tool to enlarge the selected area, and makes the texture more obvious.
<選択範囲>変形(スクショ)(英語)>
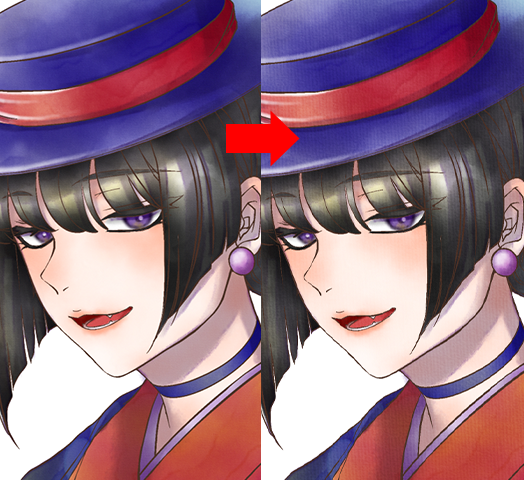
Here is the comparison with the effect we made. (Before vs. After)
Final Completion
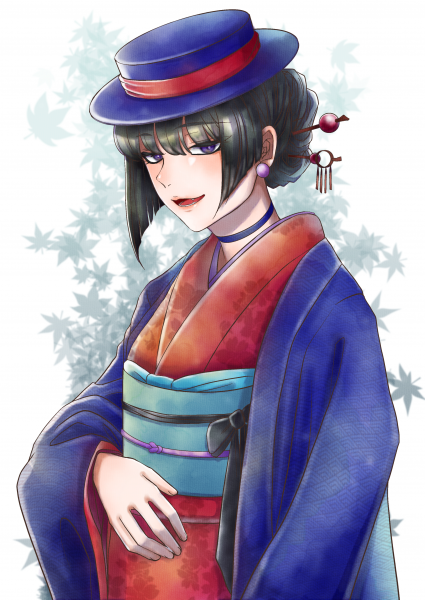
At last, add Japanese pattern to clothes and background.
If you want to know more about Japanese pattern filters, please refer to here!!
<和柄フィルタ>
Let’s adjust the color in order to make the entire color keep balance.
Use “Bucket Tool” and pour in light blue with the entire image. Decline the opacity to 10% and apply “Burn” for blending.
You can adjust the balance of its color to unify the whole. Free to rearrange it as you like.
Here is the finale!! Take it a try!!

![Watercolor Part4 [Highlight / Shadow]](https://hub.firealpaca.net/wp-content/uploads/2021/09/samune_suisai4_en.jpg)
